Before you begin
- Your business website and service area
- For live booking, your calendar account and a paid plan or included Pro trial
- For phone answering, access to the line you want to forward
Step 1
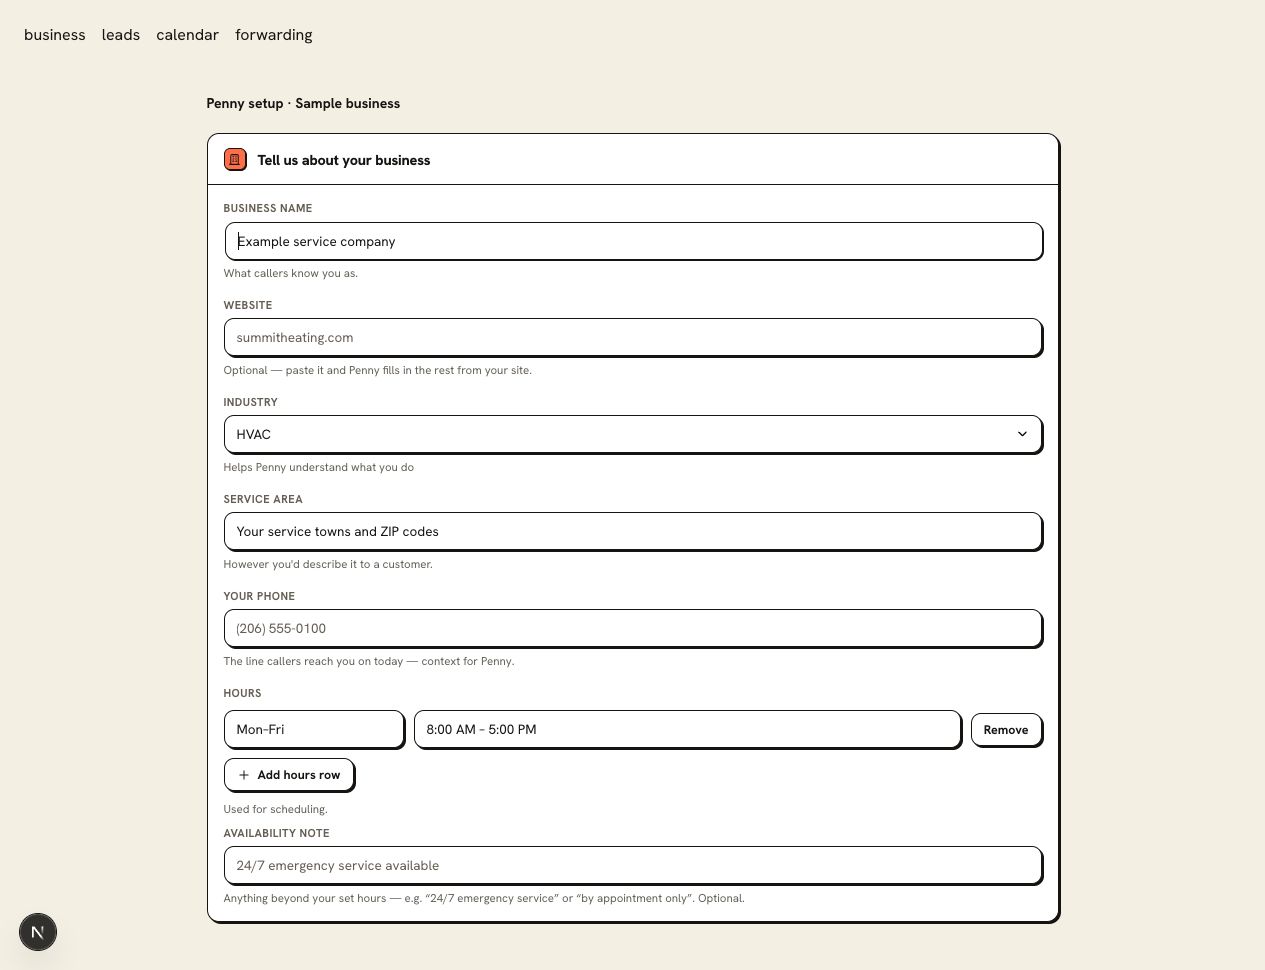
Enter the business your callers recognize
Create your account and open setup. You can return to Settings to revise the details after launch. Enter your business name, trade, service area, and website. Use the name your callers expect to hear in the greeting.
Check your hours and timezone. An emergency service outside office hours needs its own rule; it should not make every hour a routine booking slot.
Step 2
Give Penny your services and website
Review the services imported from your URL and add the business-specific facts callers need. Confirm the service area and remove any service your shop no longer offers.
Step 3
Write the greeting and required intake
Choose the greeting and voice. Set the questions the office needs answered, then mark the fields required before booking. For a service visit, start with the address, callback number, and reported problem.
Step 4
Choose the number customers will reach
For phone answering on a paid plan or your included Pro trial, select your Penny number. To keep your existing business number, forward it after testing. You can send every call or only calls your team does not answer. If you are setting up Free website chat, continue with the chat installation guide instead.
Step 5
Connect the calendar and notification inbox
Enter the email that should receive conversation summaries. For live booking on a paid plan or trial, connect Google Calendar or Outlook and choose the appointment calendar. On Free, test that a website appointment request reaches your inbox for you to confirm.
Step 6
Run your own call before forwarding the line
Start with a routine request in your own account. On a paid plan or trial, also test your urgent-call rule and inspect a confirmed calendar appointment before forwarding. On Free, check the chat record and request email before publishing the widget.
Free includes website chat at 100 conversations a month. Phone answering starts on Starter; every signup includes 14 days of Pro with no card.
You are ready when
A test conversation has the right business name, intake details, and outcome, and the summary reaches the office inbox.
If the test does not pass
- If the website import missed a service, check the published service page and re-read the URL in Knowledge.
- If no appointment appears, confirm the selected calendar and whether the call ended in a request or a confirmed booking.
Questions about this setup
Can I start with website chat?
Yes. Free includes 100 conversations a month and captures appointment requests for your office to confirm. Your signup also includes 14 days of Pro with no card, so you can test phone answering and live booking.
What if I have no website?
Enter your services, hours, service area, and house rules in setup. Your trade template gives you a starting point; add a website later to supply more business information.